
If you’ve been having difficulty with certain pests, or if you’re looking for ways to conserve space, you might have been given the advice “build a raised garden bed!” It’s true that raised garden beds offer protection from many ground-dwelling pests. They also reduce the number of weeds you have to deal with, improve soil drainage and compaction, and give you full control over the size, shape, and placement of your garden beds. You can find premade raised beds at most garden centers, but they aren’t difficult to build at home, either. If you’re feeling crafty, then keep reading to find out how to build your own raised garden bed!
Supplies and considerations
Depending on how do-it-yourself you’re feeling, the exact supplies you’ll need can vary. There are premade frames and soil mixes that can replace some of these supplies. However, here’s a general overview of things you’ll need if you plan on building your garden bed entirely from scratch.
- For the frame
- Wood, stone, or metal
- Nails, screws, staples, and/or glue.
- Hand or power tools
- Saw, drill, hammer.
- Wire mesh
- For the soil
- Basic potting mix
- Compost, fertilizer, or soil additives
Before you start gathering supplies, take stock of what you already have. Many things can be repurposed into raised garden beds, including wooden crates, tires, and washtubs. These can be used to form the frame of the garden bed, which can reduce the time, effort, and cost involved.
Consider where you’ll be putting the garden bed, and double-check how much space you’ll have for the bed. Measure out the area you want to fill before getting your supplies so you can be sure you’ll have the correct amount. When measuring the space, be sure you can comfortably reach the middle of the bed from the edge, otherwise planting and caring for your plants will be difficult. Location can also influence materials. If your bed is going to be in an area where rainwater tends to collect, for example, then making your frame out of weather-resistant materials will be more important.
The final thing to consider is how much time, effort, and money you’re willing or able to invest in this project. For example, if you’re inexperienced or in a hurry, then making a simple raised bed out of wood is a good idea. If you’ve done a few hands-on projects before or have the free time to learn a new skill, then you may be able to make a more elaborate raised bed made from metal or stone.
Creating a frame
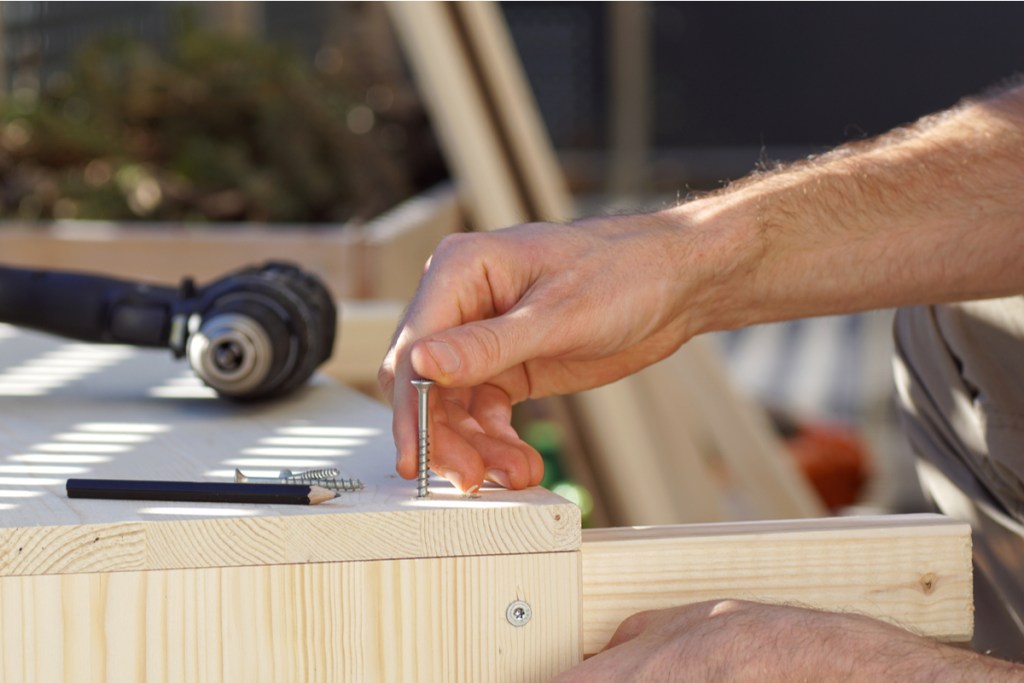
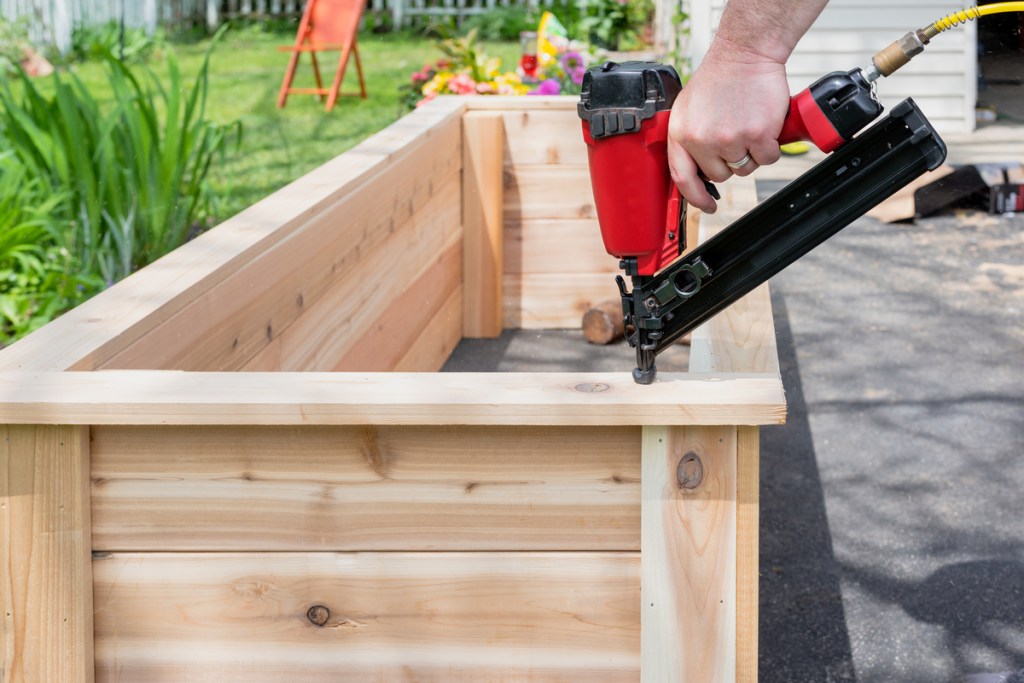
Your frame can be any size and shape you want, but the construction is more or less the same. Start by measuring out the pieces that will form each side of your frame. It’s helpful to sketch the frame out first so that you have a point of reference. Cut the pieces to the correct size and shape or get pre-cut materials from a hardware store.
Before you connect any of the pieces, arrange them to form the frame, so that you can check for any size discrepancies and see how it will look. Make sure the edges overlap where they’ll be connected so that any nail, glue, or staple will have plenty of room.
Next, attach each piece to the next one. For wood, the easiest ways to do this are either with screws and a drill or hammer and nails. Metal and stone can both be bound together using epoxy glues. Be sure your pieces are aligned correctly, especially on the bottom where they need to form a flat edge.
Once your frame is assembled, attach a piece of wire mesh to the bottom. The mesh will keep pests and weeds out but still allow worms to enter your garden. You can also use landscape fabric, which will allow water to drain but not allow anything else in or out.
Installing the bed
Clear the site where your bed will go of any sticks, rocks, or lumps. You can use a shovel to scrape the surface clean while also flattening the soil. Place the bed to be sure it stays flat, removing and readjusting as needed. The bed should sit as flush with the ground as possible.
Once the ground is flat, add the soil to your bed. You can use a premade mix, use soil directly from your yard, or make your own soil mix. Most basic soil mixes are made of plain soil and compost, typically with peat moss, coconut coir, vermiculite, or perlite added to increase water retention.
However, not every soil mix will be right for every plant. If you aren’t sure what you want to plant yet, or if you plan on growing a wide variety of plants, then it’s best to stick with a basic balanced soil mix. However, if you want to tailor your soil to the specific plants you’re growing, then making your soil mix is a viable option.
That’s really all there is to it! The hardest part is deciding what you want your raised garden bed to look like. Choosing the materials, location, size, and shape can sometimes take more time than the actual construction. Don’t forget you can also decorate your garden beds once they’re done. Whether you’re growing flowers or fruit, enjoy your new raised garden beds!
Editors' Recommendations
- 3 incredible reasons why you should be using coffee grounds in your garden
- Keep your yard happy all year with these 5 grasses that grow in the winter
- 4 November garden plants you should consider growing
- What you need to know about electric garden fences
- Are mulched leaves good for grass? Here’s how to mulch a lawn full of leaves this fall


