
Hydrangeas are elegant and unique flowers that are perhaps best known for their ability to change color based on soil pH. They’re a popular choice for traditional gardens, container gardens, and even cut or dried flower arrangements. They can grow from cuttings, seeds, or starts, and are fairly easy to care for.
However, they can sometimes develop unpleasant brown spots on their leaves. Brown spots on hydrangea leaves can be caused by several different things, although the most common causes are fungal infections. Keep reading to figure out what is causing your hydrangea leaves to turn spotty and to find out how to treat it.
Cercospora
The fungus, Cercospora beticola, causes Cercospora leaf spots on your hydrangeas. When water falls on the leaves, either from rain or overhead watering, the water droplets pick up the fungal spores. As they splash, the droplets then carry the spores to other nearby leaves, spreading Cercospora throughout the plant.
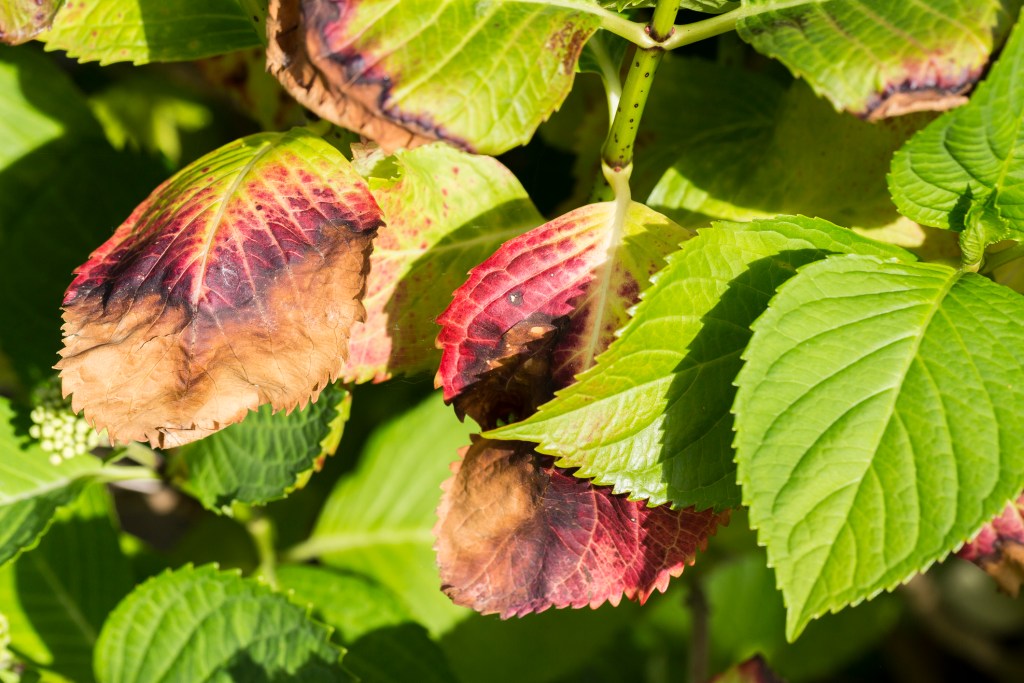
Cercospora is characterized by small round spots. It creates light brown centers and reddish-purple edges. If left untreated, the spots can grow and consume most of the leaf it’s on. Cercospora can cause damage to the plant, primarily through leaf loss, but it rarely kills mature hydrangea plants.
The easiest preventative measure is to avoid watering your hydrangeas from overhead. Instead, water below the leaves. Additionally, avoid planting hydrangeas in an area where plants have previously been infected with Cercospora. Removing infected leaves, both those on the plant and any that have fallen off, can help prevent further spread. In most cases, you can treat Cercospora with fungicides, especially those containing chlorothalonil.
Anthracnose
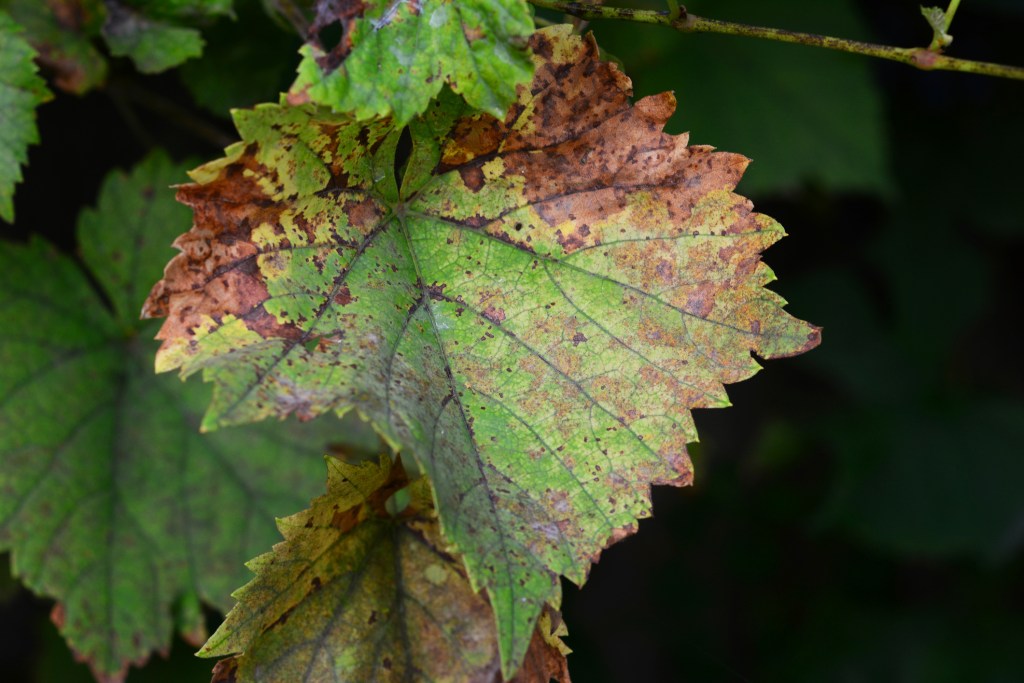
Anthracnose is caused by fungus in the Colletotrichum genus. It spreads in a similar way as Cercospora, by water droplets splashing against leaves. The first signs of anthracnose are small black and tan spots across the leaves. At this stage, it may appear similar to Cercospora. A notable difference is that Cercospora spots have a red or purple tint to the edges. Anthracnose may then develop acervuli and cankers. Acervuli look like thin black hairs or spikes, while cankers are sunken sores. These can spread from the leaves to the stems, and spots may appear on the flowers themselves.
Prevention is key for anthracnose, as severe cases are difficult to get under control. Avoid watering from overhead or planting hydrangeas in areas where anthracnose is present. Fungicides containing chlorothalonil or copper-based sprays can be effective at treating anthracnose. Remove any leaves, stems, or flowers that show signs of anthracnose to limit the spread.
Rust
Hydrangea rust is caused by the fungus Pucciniastrum hydrangea, and it’s fairly easy to identify. You’ll only find hydrangea rust on smooth hydrangeas, although the fungus also uses hemlock as a host. As the name suggests, rust spots are orange. They are usually on the underside of the leaves, but the tops of the leaves may develop yellow blisters and brown patches. Although it looks unpleasant, it isn’t fatal to the plant.
Avoid planting smooth hydrangeas in areas where you’ve previously found hydrangea rust. Additionally, don’t plant smooth hydrangeas near hemlock or in the same location where hemlock previously grew. Watering from overhead can increase the fungal spread.
Remove any infected leaves, including those that have fallen off the plant. Prune your hydrangea to increase airflow and disinfect your pruning shears to avoid spreading the fungal spores. Fungicides aren’t effective for treating rust.
Sunburn
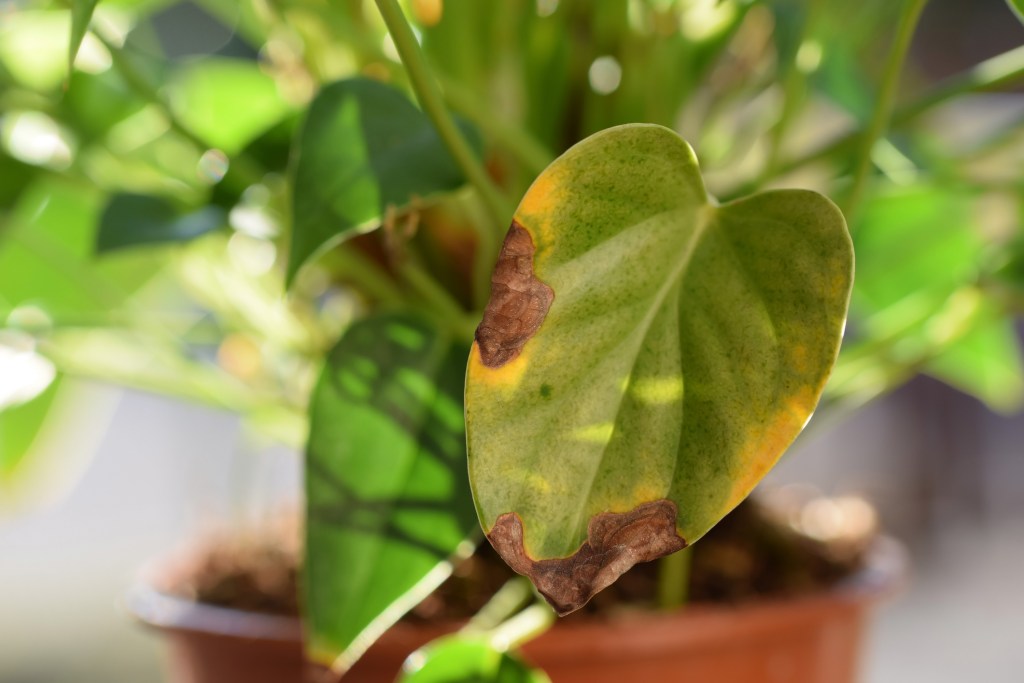
Hydrangeas are shade-loving plants, so they are particularly sensitive to sunburns. If your plant has sunburns, you’ll see irregularly shaped patches of brown on the tops of the leaves. Some sunburns may also look white or have a tint of yellow or red. The size and shape of a sunburn depend on how much of the leaf was exposed to direct sunlight. You can easily distinguish a burn from a fungal infection because a sunburn is rarely circular and it doesn’t spread in the same way that a fungal infection does.
Sunburn is caused by consistent exposure to direct sunlight. Luckily, this means it is easy to prevent. Plant your hydrangeas in the shade. If they are in partial sun, make sure they have shelter during the brightest part of the day. If your hydrangeas are near the edge of the shade, you may notice that as the plant grows, sections of it are no longer in the shade. Pruning can help control the size and shape of your hydrangeas.
Sunburn can’t be reversed, but it isn’t fatal. Move the plant away from direct sunlight to avoid further damage. You can remove severely burned leaves, while you can also remove leaves that are only lightly burned or leave them.
Hydrangeas are delicate-looking flowers, but they’re more resilient than you might think. Anthracnose and Cercospora are both avoidable and treatable. Rust and sunburn cause unpleasant blemishes, but they are easy to avoid through careful planting. Now that you’re able to identify the causes of brown spots on hydrangea leaves and you know how to deal with them, you can ensure your hydrangeas continue to thrive.
Editors' Recommendations
- 3 incredible reasons why you should be using coffee grounds in your garden
- A guide to winter lawn fertilizer for keeping your turf healthy this season
- Complete guide to red thread lawn disease: How to keep your yard lush and green
- How to test your new home’s soil to ensure outdoor plants will thrive
- When to apply fertilizer to your vegetable garden for the best, tastiest results


