
Peppers are an easy and beautiful way to add color and flavor to your meals. Whether you prefer them spicy or sweet, peppers are easy to grow, indoors and out. They’re great for warm weather vegetable gardens, including spring, summer, and even early fall. If you find yourself craving these colorful, crunchy veggies before the weather starts to warm up, then you should consider starting your pepper seeds indoors. It’s easy to do and allows you to get a head start on your growing season.
When to start peppers
Peppers cannot tolerate frost, so it’s important to plant your pepper seeds at least two weeks after the last frost date of the year when you’re growing them outdoors. When you’re growing peppers indoors, however, you get to control the temperature, so you don’t have to worry about frost. Instead, start your peppers between eight and 10 weeks before you intend to transplant them into your garden. If you want to transplant them as soon as possible, that means you should start your seeds six to eight weeks before the last frost of the year.
You can start your seeds earlier if you’d like, though. Peppers can be grown entirely indoors, which is good news if you live in an area that’s cold most of the year. If you don’t intend to transplant your peppers, or if you’re comfortable with keeping them indoors for longer, then you can start your peppers whenever you choose.
Getting your seeds started
Starting peppers indoors is similar to starting other plants indoors, so if you have prior experience you’re already ahead of the game. If you’ve never started seeds indoors, though, then this is what you’ll need.
- Small pots
- Starter soil
- A heating mat
- A grow light
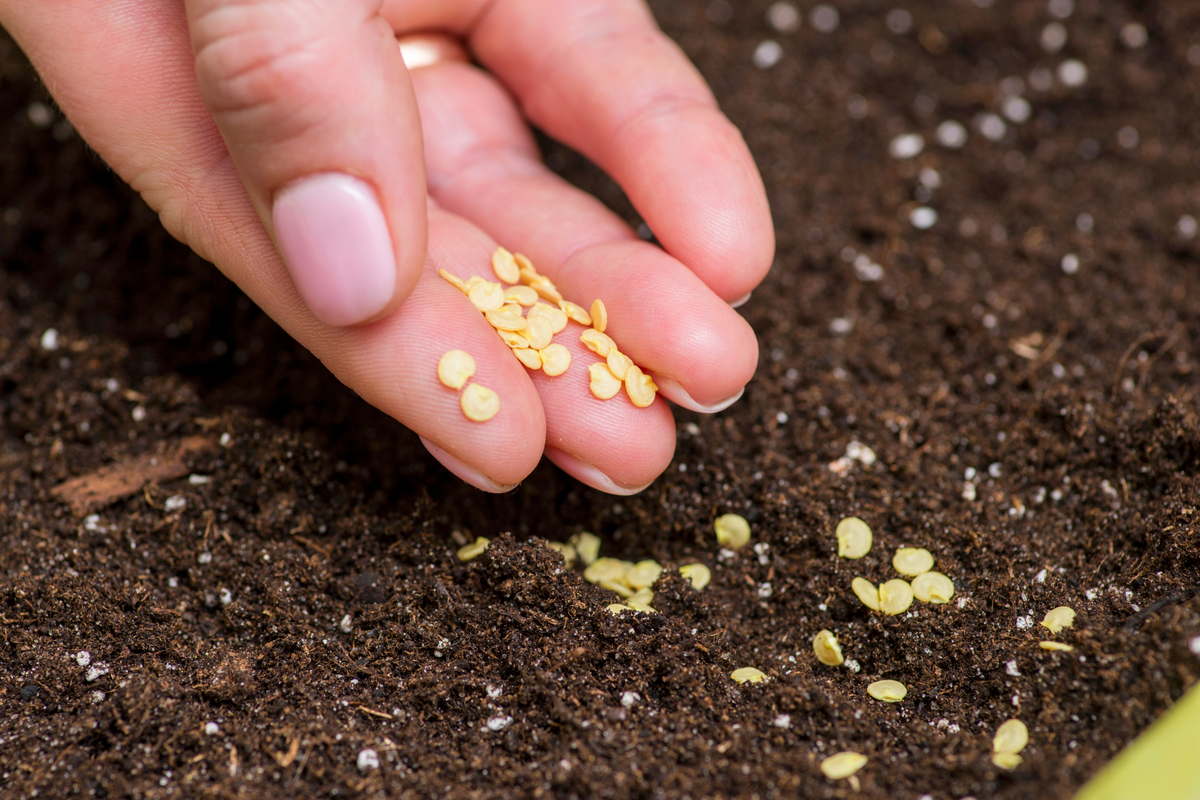
Fill your pots with starter soil, which is specifically designed for seeds. You can use regular potting soil or a mix of soil and compost if you want, but you may see better results with seed soil. Any type of pot is fine, but transplanting is easier if you use a biodegradable pot. Water the soil before adding your seed, then plant each pepper seed between one-eighth and one-quarter of an inch deep. You can plant multiple pepper seeds in a single pot to increase the odds that each pot will have a plant, but if multiple seeds sprout then you may need to thin them.
Set your pots in a warm, sunny location. Typically this will be near a window, but be sure to check for drafts first. If you don’t have a suitable location, or if you want to be certain that your plants are getting exactly what they need, then a heating mat and grow light are very helpful. Set your heating mat to between 65 and 75 degrees Fahrenheit for the best results.
Caring for your pepper seedlings
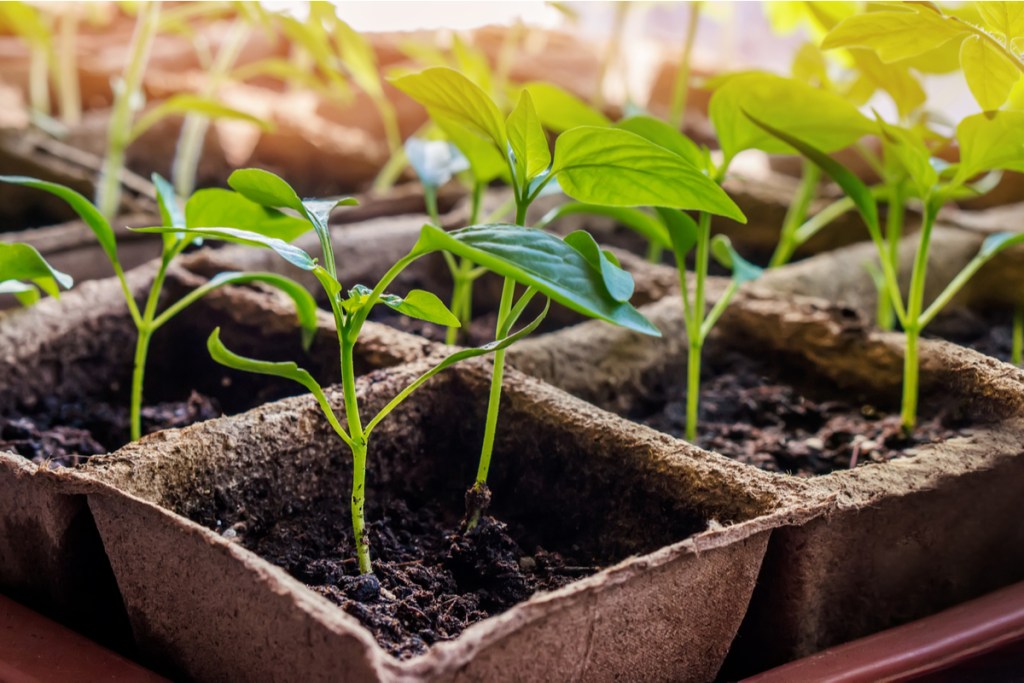
Keeping your peppers warm is important, but so is light and water. Keep the soil consistently moist but not soaking wet. Seeds and seedlings need moisture to germinate and grow, but their roots aren’t developed enough to absorb as much water as an adult plant can. Once the sprouts are growing leaves, do your best to water them underneath the leaves. Wet leaves can easily lead to fungal infections, and pepper plants are vulnerable to several fungi.
Peppers grow in full sun, so they need between six and eight hours of sun each day. In many regions, it’s cloudy during the winter, when pepper plants are most commonly grown indoors. In that case, or if you don’t have a suitably sunny window, a grow light can help you ensure that your plant is getting all the light it needs to grow properly.
Transplanting pepper seedlings
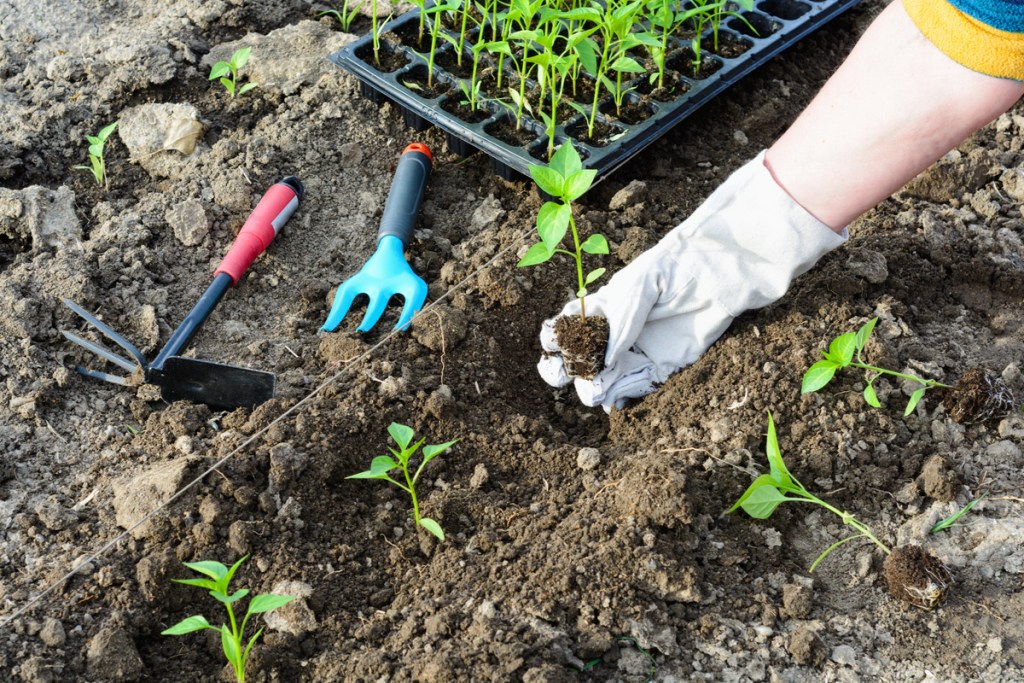
Before you transplant your peppers, it’s important to harden your seedlings. Hardening off helps your seedlings adjust to the outside elements so that the stress and shock of being in a new environment doesn’t kill or weaken them. The process is simple and essential. Start by leaving your plants outside, in a fairly sheltered location like a porch, patio, or the shadow of a wall for an hour or two. Gradually move them into less protected areas and leave them for longer periods. The whole process should take between one and two weeks. Afterward, your seedlings will have a much easier time surviving outdoors.
Knowing when to transplant is important, too. Be sure the last frost date has passed before you begin hardening your seedlings. Otherwise, there are two important times to keep in mind. Three or four weeks after they sprout, when they are a couple of inches tall, transplant them into a larger pot so they can continue to grow. They’re ready to transplant into the garden at seven or eight weeks after planting. They should have several sets of leaves and be roughly half a foot tall, depending on the variety.
Peppers are versatile, beautiful, and easy to grow. As long as you keep them warm and give them enough light, you’re likely to see success. If you’ve never started a plant from seed before, then peppers are a good place to start. You’ll get the hang of it in no time, and once you see your first harvest of peppers you’ll be glad you tried it!
Editors' Recommendations
- 3 incredible reasons why you should be using coffee grounds in your garden
- The truth about holly leaves – interesting facts you might not know
- Do you live in climate zone 10? Here’s our guide to choosing the perfect climate zone 10 plants
- Gardening 101: 7 easy seeds to grow in cups for a tiny, adorable, and low-maintenance indoor garden
- These are the 10 best gardening shows to stream right now


