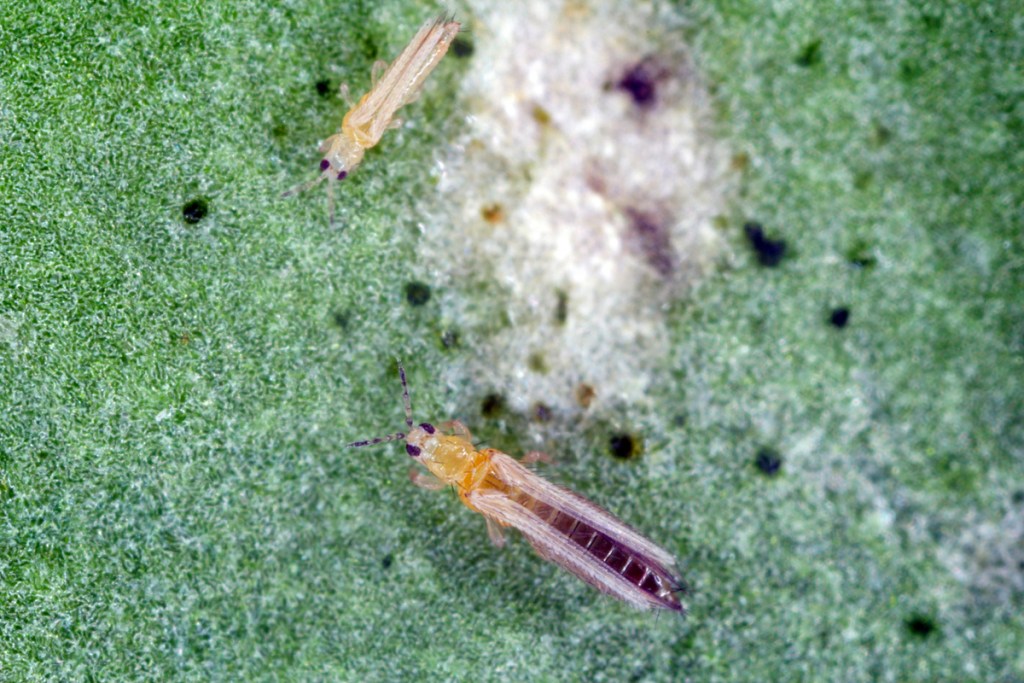
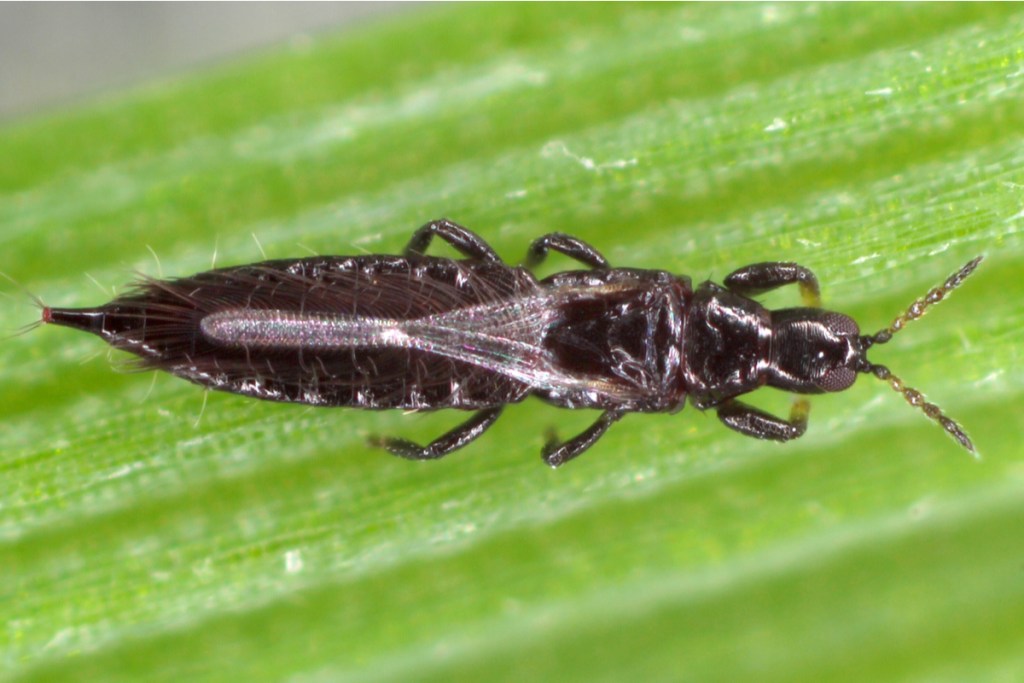
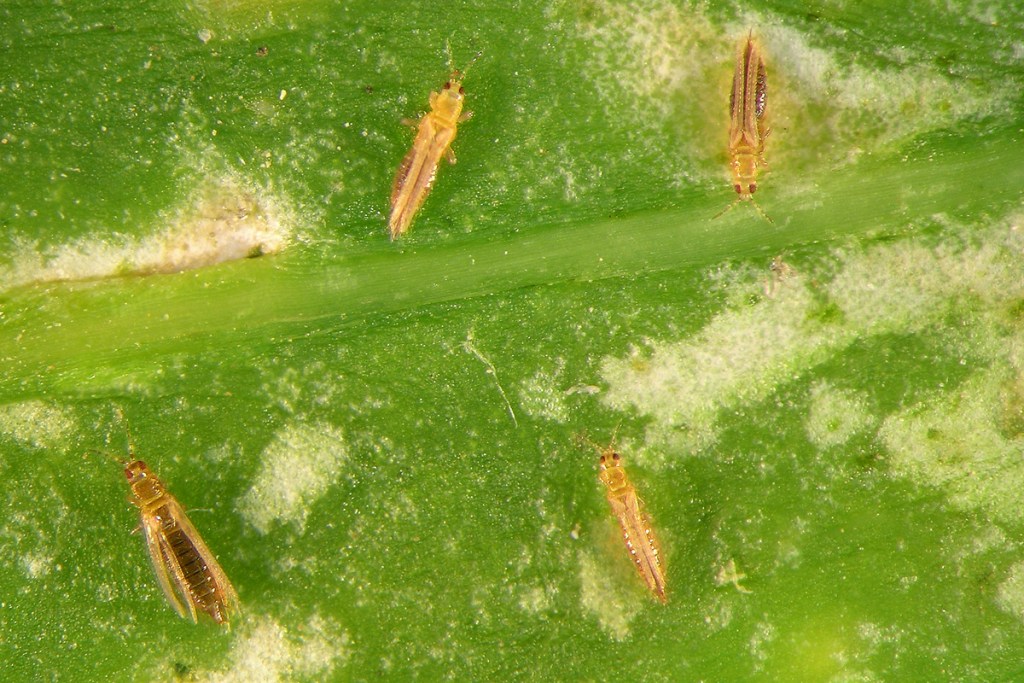
Thrips can be one of the most infuriating pests for both indoor and outdoor gardeners. There are more than 6,000 species around the world, and gardeners who find themselves in the midst of an infestation often wonder how to kill thrips—or else, how to get rid of them with organic pest control methods—and if their indoor plants are safe.
Thrips are a rather common pest that can infest your greenhouse, outdoor garden, and indoor plants. They’re very small—adults only reach up to 1/25 of an inch in size—and can be tan or black. Their damage is twofold, from active to residual once they’ve been removed. Thrips cause destruction by scraping at various parts of a plant, including the leaves, fruits, and flowers. Damage from thrips is the worst in a hot, dry climate.

Look for signs of thrips before buying a plant
Once damaged, leaves can turn pale or silvery and will eventually die, which is less than appealing to any home gardener and their success. If you’re at a nursery picking out a plant, the hope is that they won’t have been damaged by thrips. Thankfully, there are ways to tell if thrips are presents.
Step 1: Take note of any discolored, scarred, or twisted leaves.
Step 2: Tap the plant and make note if any insects fly away. Thrips feed and infest in large groups, and when disturbed, they will fly away.
Step 3: If you see a plant at a nursery that appears to be infected with thrips, do not buy it.

Check for signs of thrips among plants already in your garden
The first step to managing or preventing an outdoor/greenhouse thrip infestation is garden maintenance. Thrips will spend the winter months buried in the garden soil, emerging in the spring to lay their eggs. Because females don’t need to mate to reproduce, they start laying as soon as they burrow out of the ground.
Step 1: Clean up any plant debris (fallen leaves, broken stems, etc.) as soon as you notice it. These spots are breeding grounds for thrips.
Step 2: Monitor your plants for signs of thrip eggs inside the stems.
Step 3: Remove any weeds or tall grasses that are around your garden. Thrips could infest those areas and then move on to your plants—and you likely won’t realize it before it’s too late.

Remove thrips naturally
Along with the above ways to prevent thrips, there are also ways to get rid of them naturally without using any harmful pesticides.
Step 1: If at all possible, isolate the infected plant before the infestation can spread to surrounding plants.
Step 2: If you have a small infestation, fill a spray bottle with water and spritz the infected plant. Then wipe away the thrips. Repeat this step every day until the infestation has cleared up.
Step 3: For heavier infestations, you can also use insecticidal soaps, which are made from natural plant oils, to smother the thrips. Getting rid of them naturally could be a bit trickier with larger thrip populations, so you may also have to resort to a short-lived, minimally toxic insecticide to lessen your thrip count.
Step 4: Once the infestation has been cleared out, consider planting certain flowers that attract thrips’ natural predators. These insects are often beneficial to your garden, helping to cull and prevent future thrip infestations.
Step 5: If nothing clears the infestation, place the plant into a trash or grocery bag, seal it off so that the thrips can't escape, and dispose of the plant. It’s always sad to see a plant go, but it's better than letting the infestation spread to the rest of your garden.

How to prevent a future infestation of thrips
Now that you've gotten the existing infestation under control, you probably don't want to deal with it again.
Step 1: Inspect every plant before you bring it home. If you notice insects, either don't buy it or quarantine it away from your other plants while you eliminate the infestation.
Step 2: Clear away dead leaves and weeds from your plants to take away the prime breeding ground for thrips.
Step 3: Inspect your plants regularly so that you can begin treating an infestation before it gets out of control.
Thrips can be a very tricky infestation to control, but thankfully, there are natural measures you can use to rid your plants of them. Natural insecticidal soaps can be used both indoors and outdoors, and remember the tips and tricks here to help you prevent an infestation in the first place.
Editors' Recommendations
- Everything you need to know about trailing succulents care for lush, thick growth
- How to pick the perfect orchid pots for healthy blooms
- Beyond basil and cilantro, add these unique plants to your indoor herb garden
- Beautiful, low-maintenance pothos varieties to add to your plant collection
- 5 easy-care spider plant varieties perfect for any home garden


