Like many plants, blackberries can be propagated and used to grow new sprouts. These sprouts can be used to increase your collection or given to blackberry-loving friends and family who want to grow their own too! When to propagate will depend on the technique you choose to use, so make sure you follow these methods of propagating blackberries as closely as possible for the best chance at success.

How to propagate from root cuttings
One of the most common plant propagation methods works for blackberries, too. Propagating blackberries from cuttings is fairly straightforward and can be done with either stem or root cuttings, depending on your long-term goal.
Step 1: To take a root cutting, use a pair of sterilized scissors or a sharp, sterilized knife to take a cutting between 3 and 6 inches. Use straight cuts close to the crown of the plant and angled cuts farther away. Only take cuttings during the plant's dormant period in the fall.
Step 2: Bundle the root cuttings together, with the straight cuts on the same side.
Step 3: Place the root cutting bundle or bundles into cold storage (such as a refrigerator) for approximately three weeks.
Step 4: After the storage period, lay the cuttings out, 2 to 3 inches apart, on a peat and sand mixture and cover them lightly with soil.
Step 5: Cover the cuttings with clear plastic wrap to protect them, but be sure to leave enough room so that they aren't smothered.
Step 6: When your new sprouts appear and take root, plant the new blackberry plants in your garden.

How to propagate from stem cuttings
If you’re looking to propagate many blackberries at once, stem cuttings are the best option for you.
Step 1: While the plant is still firm, use a sterilized pair of scissors or a sharp, sterilized knife to take leafy stem cuttings of about 4 to 6 inches long.
Step 2: Place the stem cuttings on a peat and sand mix with the bottom ends of the cuttings pressed a couple inches into the soil.
Step 3: Place the stem cuttings in a shady location and be sure to mist them regularly.
Step 4: When roots develop, the young blackberry plants are ready to plant.

How to propagate through suckers
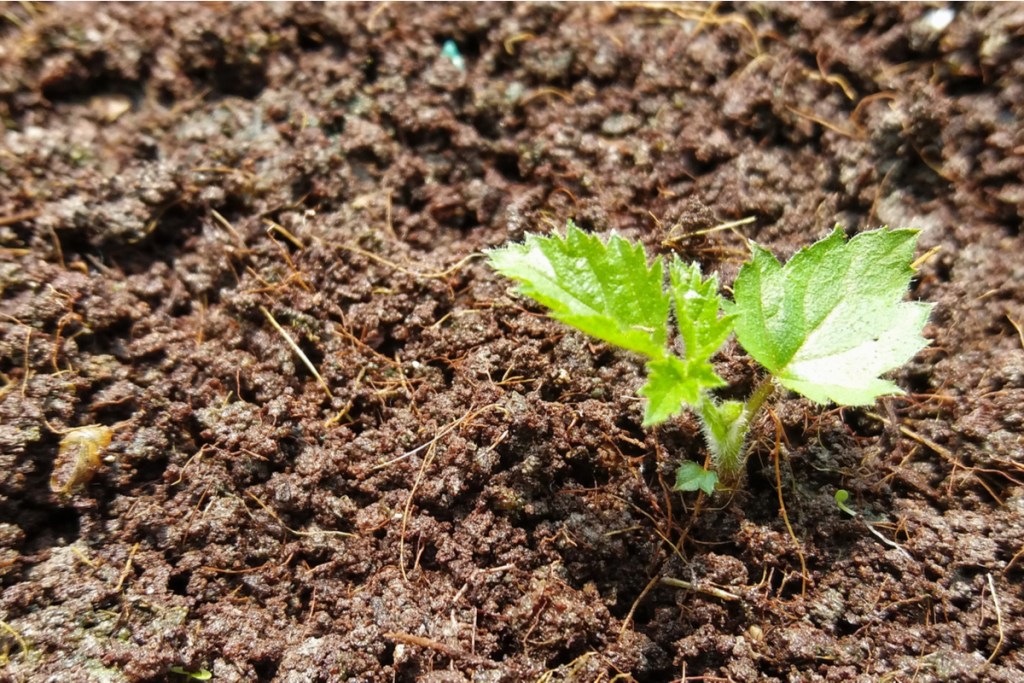
Propagating blackberries from suckers is one of the best ways to root the plant. Suckers are baby plants (in this case, baby blackberry plants) that grow horizontally from the roots of the parent. These are often the best way to propagate a new plant because they’re already on their way to being one!
When removing suckers, be sure to do so as close to the ground as possible, and be careful. It’s still a baby plant, and you don't want to damage it or do anything to cause it to not be viable. If the sucker plant doesn’t have its own root system yet, it isn’t grown enough to be removed. If it does have its own root system, you should be able to safely separate it from the parent plant and replant it elsewhere in your garden. Use a small hand shovel to dig around the base of the plant to remove the sucker without causing damage.
How to propagate by tip layering
The other successful method for propagating blackberries is called tip layering. This works by pinning the tip of a stem into the ground, covering it with some soil, and caring for it until there’s enough of a new root system to cut the new plant away from the parent.
Step 1: In late summer to early fall, pin the tip of a blackberry stem into the ground with bobby pins to keep it flat. Leave the tips pinned and covered throughout winter.
Step 2: When the weather warms in the spring, assess the pinned plant for new offshoots with root systems. Gentle separate the new plants from the parent plant and replant.

How to care for blackberry plants as they grow
Now that you've gone to the trouble of getting all these adorable baby plants, you'll need to know how to help them grow into mature, healthy plants, right?
Step 1: Plant young blackberry plants in an area with full sunlight and space to expand. Blackberry plants can handle some shade, but too much will negatively affect the amount of fruit produced.
Step 2: Plant the blackberry plants in well-draining soil that has not been used to grow other crops like strawberries, tomatoes, or peppers in the past three years. All of these plants are prone to similar diseases, so planting your blackberries in a new location will limit any negative impacts to your plant.
Step 3: During the first three weeks after planting, water your blackberry plants frequently. Watering should be done during the day, and you’ll want to make sure the top inch of the soil is moist.
Step 4: After the initial three-week watering period, your blackberries should receive 1 to 2 inches of water once a week during the daytime (and 4 inches of water during harvest season). Remember that blackberries have a fairly shallow root system, so it’s best not to let more than the top 6 inches of soil dry out.
With just a little bit of luck and some proper care, you’ll have no trouble propagating and growing new blackberry plants so that you'll have fresh berries all growing season long next year!
Editors' Recommendations
- Focus on color: Bring some sunshine to your garden with these orange plants
- Grow your indoor or outdoor garden and support these Black-owned plant shops for Black History Month
- How to properly store and preserve your harvest vegetables in cold storage
- 5 garden upcycling ideas: Creative ways to reuse household items for plant accessories
- The best vegetables to plant in December


