
How to install solar lights to save on electricity and protect the planet

walkway illuminated by solar garden lights

Tired of walking through a dark yard at night? Outdoor solar lights offer an affordable, convenient way to illuminate the landscape without the hassle of wiring. Best of all, DIY installation is beginner-level easy.

We’ve assembled these solar landscape lighting tips to help you decide if this is the best solution for you. Each brand and style of solar yard light differs somewhat on installation details, so it’s important to read and follow all of the manufacturer’s instructions carefully. Just ahead, read the basic steps for installing these lights, along with key considerations as you plan your project.

How to install solar lights

For this project you will need:

  • Solar lights
  • Cordless drill/driver
  • Drill bits
  • Torpedo level
  • Measuring tape
  • Marking paint
  • Garden hose

Step 1: Identify the location

Regardless of the brand or style of lights you choose, all solar lighting needs full sun exposure throughout the day. Ideal locations receive a minimum of eight hours of direct sunlight every day. More is even better. Adequate sun exposure ensures that the onboard solar cells will be able to fully charge the batteries for maximum runtime. The more hours they bask in the sun, the greater the chance they will charge fully.

There are several factors to consider here. Buildings and trees cast shadows that move throughout the day as the sun moves overhead. So it’s important to gauge the total hours, not just the intensity of mid-day sunshine. Also, bear in mind that the angle of the sun changes through the seasons as well. An area on the north side of a building that receives sunshine in July could be in full shade by October.

In addition to the sun exposure, consider maintenance. Avoid placing the lights where they’ll hinder mowing and other lawn maintenance work. They should be plainly visible, but not in the way.

Step 2: Read the instructions

Be sure to read and follow the manufacturer’s instructions before getting started. Understand the options that are available with the model you chose. Some pre-assembly may be required. There may be on/off switches to set manually, but some types have integrated photo sensors that turn the light on and off automatically. Some models have battery-saving motion sensors that turn the lights on only when they detect movement. These must be oriented in a particular direction to turn the light at the right time.

Step 3: Installation

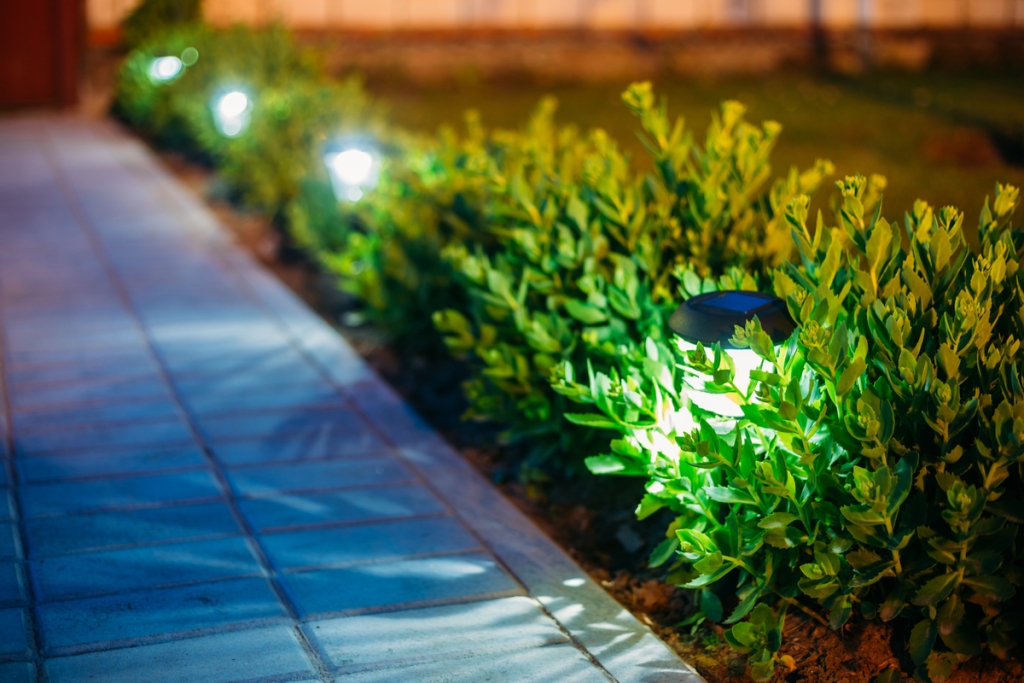
Measure and mark the route and location for every light. Space the lights 6 to 8 feet apart for general lighting purposes, such as illuminating a walkway. For increased visibility near trip hazards like curbs or steps, they can be spaced as closely as 4 feet apart. For curved garden pathways, roll out a garden hose as a mold to guide placement. When you’ve created the line you like, measure the spacing with a tape measure and use marking paint to place a dot on the ground where each light should go.

Actual installation varies with the type of lighting you’ve chosen. For stake lights, simply stick the light into the ground wherever you need it. Wall, fence, or post mounted types usually come with the required hardware, although they may require pre-drilling or leveling.

backyard solar lights at night

Solar landscape lighting tips

  • Fully charge the batteries for at least 12 hours before installing and using them.
  • Only install solar lighting if the area receives 8 hours of daily sunlight.
  • For shady areas, choose a solar light with a remote panel. The light goes in the shade and is connected by a cable to the solar panel that’s placed in a nearby sunny spot.
  • Bury any cables in a 6 inch trench to avoid cutting them with lawn equipment.
  • Choose the type of fixture that matches the need: stake lights for pathway lighting, wall lights for building entryways, etc.
  • Clean the lights often to maximize sunlight penetration into the solar cell.
  • Keep landscape plants trimmed well away from solar lights.
  • Use caution when installing stake lights in hard, dry soil. Soak the soil with water to soften it beforehand, rather than forcing the light, which could break it.
  • If you know you need several lights, look for bulk purchase options to lower the cost.

Whichever type of solar yard light you choose, the process is going to be simple. For best results, be sure to consider the purpose of the lights when choosing the type and planning out the spacing. Follow the manufacturer’s directions for installation and keep the above tips in mind for a fast, easy experience and a safer, more functional yard.

Editors' Recommendations

Topics
3 of the best solar garden lights for a bright and eco-friendly yard
outdoor sitting with lights

It's important to decorate your garden with stunning flowers and veggies, but it's also vital that your garden be well lit. Whether for parties, late-night harvesting, or quiet nights reading in the warm summer air, solar lights make a fantastic addition to any garden. They can transform a backyard into a cozy after-dinner area, light up a walkway for safe navigation, or bring attention to a favorite tree. Here we'll be going over the essential considerations to keep in mind while shopping for solar garden lights. We'll also include a few of our favorites you might want to add to your landscaping.

What to consider when buying a solar garden light
Not all solar garden lights are created equal; there are a few things you'll want to keep in mind.
Cost
The cost is one of the most important aspects of purchasing a new item for almost everyone. Although solar garden lights are very similar in price, it's still crucial to consider how much you're willing to spend on lights before you go looking. Having a better idea of your budget will help you find the ideal solution.
Ease of install
If you need something easy to put up for a party this weekend, you won't want to buy a setup that'll take hours to put together. Instead, finding a solar light that's easy to install will make life easier and allow you to get back to doing other things like gardening!
Lifespan
Outdoor products never last as long as their indoor cousins, so it's not surprising to find that solar garden lights have a shorter shelf life than other indoor lights. However, this doesn't mean you should have to replace your garden lights every year or bring them in during the winter. Instead, look for a light that can withstand the types of weather you often see and be sure to care for the light properly so it can last a long time.
Aesthetic
Of course, you should like the way your new lights look! If they don't suit the aesthetic of your garden, you'll likely be disappointed and tempted to go looking for other options. So be sure you're looking for a light that's going to suit the rest of your garden, or at least blend in and not take away from your garden ornaments.
MAGGIFT Solar Pathway Lights
These pathway lights by MAGGIFT are ideal for lighting the way during the darker hours of the day. Whether it's the path from the driveway to the house or the deck to the flower garden, these lights will soak up sun rays and provide you with plenty of light to see your way.

Read more
When and how to transplant tomato plants for the best results
baby tomato plants

There's a time in every gardener's life when they try to grow their own veggie plants from seed. This is a gratifying process, and there are many benefits to growing your own seed starts. One of those benefits is bigger and healthier plants. By growing your own baby tomato plants, you can ensure that the plants are well cared for, never given anything you don't want them to have, and transplanted in just the right way at just the right time for optimal plant health. So how do you transplant tomato plants to ensure they're happy and healthy and live to produce lots of yummy tomatoes for your home?

How do you transplant a grown tomato plant?
If you've never transplanted tomatoes before, the idea can be intimidating. You have all these tiny plants that you've cared for over the last several weeks, and now it's time to pluck them out of their nursery pots and plop them into the outside soil where they're exposed to sun, weather, and critters. Luckily, you've cared for them so well that they're healthy and robust plants that will be able to handle anything nature throws at them.
Step one: Harden the plants
Hardening the plants is a term gardeners use when talking about the process of acclimating a greenhouse-grown plant to outside conditions. Typically it refers to sunlight, but it could also refer to wind and other weather that could harm the plant. About a week before you're ready to transplant, you'll want to harden your baby tomato plants by exposing them to sunlight at increasing increments each day. For example, day one should be about 30 minutes, then 45, then 50, and so on until the day of transplanting. If you don't do this, you'll risk your plant being burnt and killed when you transplant it outside.
Step two: Don't water the plants
Before you start pulling little plants out of their pots, you mustn't water the plants a few days before transplanting. Wet soil can make the transplanting process much harder on you and the plant. Dry soil falls away easier and is less likely to break off roots as you move the plants to their new home.
Step three: Prepare the new soil
The new location for your tomato plants will need to be prepped before you get all those babies out of their homes. Whether you are planting into the ground, a raised bed, or a pot, you'll want to amend the soil to guarantee that the plant has many nutrients to soak up. It also is easier if you dampen the soil right before transplanting. Damp soil is much more manageable and more easily manipulated around the plant.
Step four: Plant deeply
As you gently pull out the baby tomato plants, you'll want to shake off the old soil to expose the roots. This will ensure the plant has access to the new soil and nutrients you're about to provide it with. 

Read more
5 outdoor living trends that will totally improve your 2022
women outside sitting

After being stuck in our homes the last two years, we've started to realize that making our homes into a lovely place to be is very important. However, we can only stay inside for so long before we ache for sunshine and nature. Turning your outdoor space into a haven where you can escape the indoors and enjoy some fresh air will improve your 2022 no matter what it throws at us. So here are some ways to spruce up your outdoor living space so you can enjoy the spring when it finally comes back around.

Bring indoor luxuries to an outdoor space
The best way to encourage yourself to go outside more often is to make it as comfortable as possible. So often, we choose indoor seating instead of going outside simply because that huge sectional is way more comfortable to lounge on. So instead, invest in comfortable seating, plenty of surfaces for drinks and electronics, and maybe even purchase some umbrellas or awnings so you can sit outside even if it's lightly raining. Making an easy transition from indoors to outdoors will encourage everyone in the home to come out more often and enjoy the space.
Vertical gardening
Not everyone has the luxury of having an expansive backyard. If you're struggling to know what to do with your smaller space, but you know you want more plants and gardening opportunities, try vertical gardening! This is where you take a wall of your deck or fence and grow plants one on top of the other. You might have seen these as living walls or those DIY projects with pallets and herbs. Either way, growing flowers or veggies vertically allows you to garden without taking up precious space in your smaller yard.
Outdoor office
Many of us spend a lot of time inside at our desks. If you were lucky enough to work from home the last few years, you might have a pretty decent setup for your home office. However, spending all day inside when the weather is excellent can be depressing, and if you're home, why not take advantage of the opportunity and create an outdoor office space? This allows you to keep working while enjoying the sunshine and fresh air. Endless studies are proving that getting outside more often improves mental and physical health!

Read more