
Why you need to make greenhouse maintenance a priority

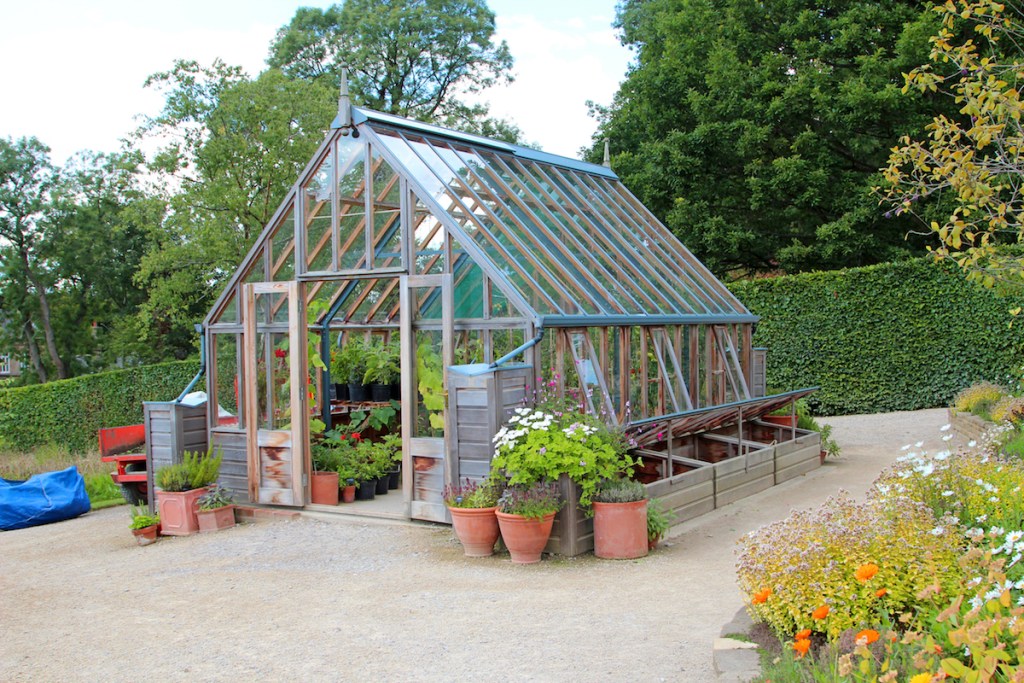
Greenhouses come in all shapes and sizes, but they all work the same way: They’re insulated structures that provide warmth and protection to growing plants. Vegetables, fruits, and ornamental plants do well in greenhouses. As with any environment, you’ll want to spruce up this space so your plants can thrive in their home. Ahead, we break down why you should maintain your greenhouse and go through which tasks you should put on your greenhouse cleaning checklist. 

Greenhouse

The benefit of having a greenhouse

One of the main reasons people use a greenhouse is to extend the growing season. This space offers bountiful sunlight and warmth so you can successfully start vegetables in early spring and autumn. While your plants receive enough energy to photosynthesize, they can also avoid rain, snow, and wind. After starting your plants, you can bring seedlings out into your garden once they grow big enough or the weather becomes warm enough. 

A tropical greenhouse
Free-Photos/Pixabay

Reasons to maintain your greenhouse

Your greenhouse is a beautiful plant-filled space, but it still needs love and care like every other space.

Orderliness

While you may use a greenhouse for the sole purpose of keeping your plants warm, it’s presumably an area where you’ll spend a lot of time as a gardener. Maintaining this space will make it not only more visually appealing but also more functional. You want to navigate this space with ease. Designating areas for specific plants, tools, and resources will make greenhouse gardening more efficient. 

Pest control

Garden-friendly insects exist — ladybugs help with aphids, and bees aid with pollination. But not all critters will be good in a greenhouse. Pests and diseases that kill plants can quickly grow out of hand in a hot and humid greenhouse if you don’t keep an eye on your soil and foliage. 

Temperature regulation

Regulating the temperature in your greenhouse makes it comfortable not only for you but also for your plants. Extreme temperatures in the winter and summer can be strenuous on your green friends. Concentrated heat especially becomes an issue in hot weather, so you want to give your plants enough shade and ventilation so they don’t burn and wilt. 

Optimal photosynthesis 

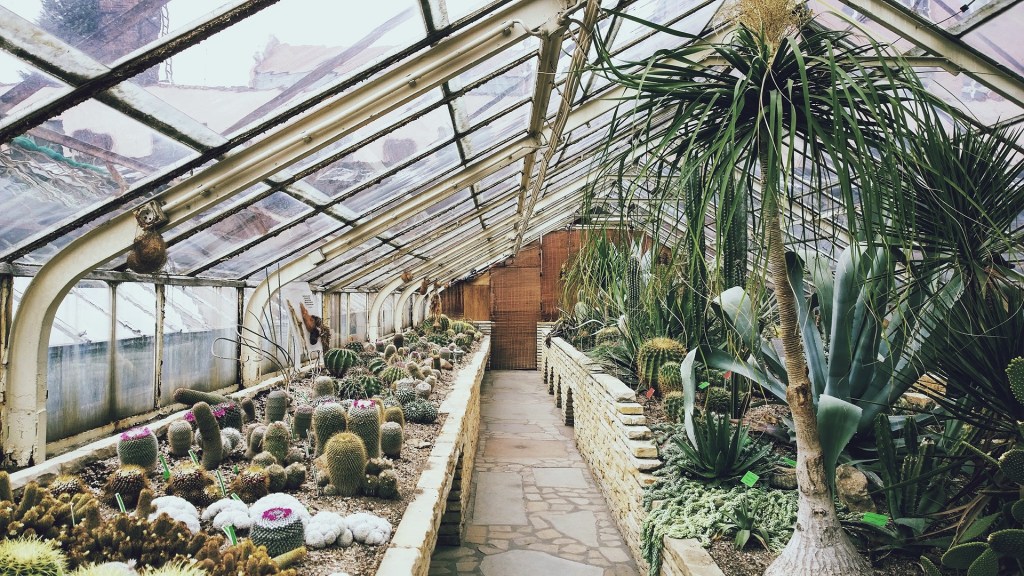
Greenhouses essentially trap light and heat. Plants convert sunlight into energy to grow, and they need warmth to survive, as well. Optimizing photosynthesis in a greenhouse will require clean windows and walls so that sunlight can enter. When it comes to warmth, many greenhouses will have thermal mass, which refers to stored heat. Gardeners will keep water jugs or bricks around in this space so these materials absorb excess heat during the day and release it when it’s cold at night. 

Potting plants
Gary Barnes/Pexels

Your greenhouse maintenance checklist 

Not sure where to start? We’ve got you covered with our inclusive maintenance checklist.

Tidy up your greenhouse

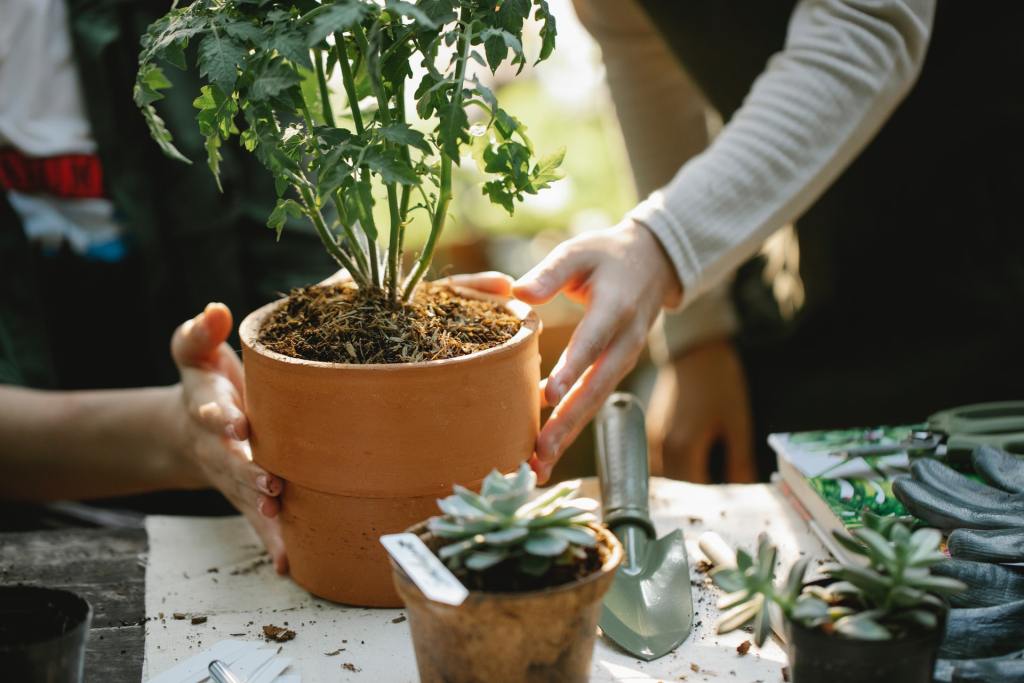
Tidy up your greenhouse by sweeping away debris and pulling weeds. Arrange your plants by similar requirements — you wouldn’t want to put a thirsty begonia next to a succulent aloe vera plant. Assess your space and see if you need any extra organizers or shelves for your plants and tools. 

Check your soil and leaves for pests and diseases

Every so often, check the undersides of your leaves for any signs of pests. Also, observe your soil for any growths or odors. It’s best to start with healthy plants from your local garden center so you won’t have to spend so much time with pest control. To keep plants happy, add compost and fertilizer to encourage growth. 

Dead leaves and residual dirt may make your greenhouse a hospitable environment for insects such as fungus gnats. If you have plants impacted by pests such as spider mites and scale, take care of them as soon as possible with water, alcohol, or neem oil. You don’t want the pests to stick around for long as they may spread to other plants. 

Gauge if your greenhouse needs extra ventilation or heat protection

During the summer, it’s critical to give your vegetables and plants enough ventilation. There are many ways that you can go about doing this. First of all, you can install fans in your greenhouse. If your plants start looking burnt, add shade cloths to the roof or windows. Gardeners who are still in the process of designing their greenhouses should consider installing windows and doors that open. 

Keep in mind the opposite — heat retention, which is a concern for cold nights. If you don’t close up your greenhouse altogether during the winter, consider using frost blankets and cardboard covers to protect your plants. You can throw glass panels over seedlings to warm them up and supplement them with heat mats. Use thermal mass in the form of water barrels, hay bales, or gravel. Thermal mass will absorb heat during the day and release it during the night. Some gardeners may even add a small space heater. 

Clean your greenhouse roof and walls

To make sure your greenhouse receives enough sunlight, you want to clean its walls and windows. Greenhouses are made from a translucent plastic or glass material, so water and mild soap should get the job done. Wipe away buildups of dirt, algae, and other debris so your plants can efficiently convert sunlight into energy. 

Maintaining your greenhouse may feel like a daunting task. However, if you break the work up into a checklist, you’ll be well on your way to creating a hospitable home for your plants.

Editors' Recommendations

3 of the best solar garden lights for a bright and eco-friendly yard
outdoor sitting with lights

It's important to decorate your garden with stunning flowers and veggies, but it's also vital that your garden be well lit. Whether for parties, late-night harvesting, or quiet nights reading in the warm summer air, solar lights make a fantastic addition to any garden. They can transform a backyard into a cozy after-dinner area, light up a walkway for safe navigation, or bring attention to a favorite tree. Here we'll be going over the essential considerations to keep in mind while shopping for solar garden lights. We'll also include a few of our favorites you might want to add to your landscaping.

What to consider when buying a solar garden light
Not all solar garden lights are created equal; there are a few things you'll want to keep in mind.
Cost
The cost is one of the most important aspects of purchasing a new item for almost everyone. Although solar garden lights are very similar in price, it's still crucial to consider how much you're willing to spend on lights before you go looking. Having a better idea of your budget will help you find the ideal solution.
Ease of install
If you need something easy to put up for a party this weekend, you won't want to buy a setup that'll take hours to put together. Instead, finding a solar light that's easy to install will make life easier and allow you to get back to doing other things like gardening!
Lifespan
Outdoor products never last as long as their indoor cousins, so it's not surprising to find that solar garden lights have a shorter shelf life than other indoor lights. However, this doesn't mean you should have to replace your garden lights every year or bring them in during the winter. Instead, look for a light that can withstand the types of weather you often see and be sure to care for the light properly so it can last a long time.
Aesthetic
Of course, you should like the way your new lights look! If they don't suit the aesthetic of your garden, you'll likely be disappointed and tempted to go looking for other options. So be sure you're looking for a light that's going to suit the rest of your garden, or at least blend in and not take away from your garden ornaments.
MAGGIFT Solar Pathway Lights
These pathway lights by MAGGIFT are ideal for lighting the way during the darker hours of the day. Whether it's the path from the driveway to the house or the deck to the flower garden, these lights will soak up sun rays and provide you with plenty of light to see your way.

Read more
A complete guide to cleaning your greenhouse for beginners
greenhouse

When you first installed your greenhouse, it probably looked like a glittery glass castle for your lovely plants to grow and live in. However, weather, soil spills, and birds have made their mark on your greenhouse over time and now it's probably looking cloudy and nasty. So how do you clean a greenhouse?
Why worry about a clean greenhouse?
You may be wondering if you even need to worry about cleaning your greenhouse. If you don't mind the dirty look, maybe you could leave it as it is? Unfortunately, it's much better for your greenhouse and your plants if you give the greenhouse a deep clean at least once a year. It'll make it easier to use when it is clean and organized, and the walls of the greenhouse need to be clear so they can let in as much light as possible. Additionally, a clean greenhouse is less likely to spread pests and diseases to your precious plants. And lastly, things last longer when you care for them and greenhouses aren't cheap.

When should you clean a greenhouse?
There's no right time to clean a greenhouse; whenever you can is better than not at all. However, we suggest cleaning it when there isn't so much to do in the garden and it isn't so hot out. Usually, the fall is when the garden chores slow down and it starts to cool out, making cleaning the greenhouse much easier on you.
What is the best way to clean a greenhouse?
You can use whatever cleaning method works for you, but here is our step-by-step process that we recommend.
Step one: Empty the space
Of course, we know you can only empty a greenhouse so much if you have tender plants that need to stay warm. But as much as you can, take out the tools, buckets, and bags of soil. It will be much easier on you if you don't have to fuss with items in your way as you clean the walls and floors. This also allows you to go through what you have and declutter if necessary.
Step two: Rough dusting
Over the season, spiders and bugs and maybe even some mice have tried to make homes in your greenhouse. This has probably led to a few cobwebs and dust piles around the corners. You'll want to remove these large areas of debris before you start the deep cleaning. Use a broom to knock down the cobwebs and sweep up the floor; you've probably spilled some soil during the summer!
Step three: Clean the walls
The panels of your greenhouse will now need to be deep cleaned. You can use a bucket of warm water and a sponge to wipe them down, but we also recommend bringing a long-handled brush to make life easier. This way, you can dip the brush into the bucket of soapy water and scrub down the walls with the long-handled brush. You'll be able to reach every inch of the walls without killing your back.

Read more
When and how to transplant tomato plants for the best results
baby tomato plants

There's a time in every gardener's life when they try to grow their own veggie plants from seed. This is a gratifying process, and there are many benefits to growing your own seed starts. One of those benefits is bigger and healthier plants. By growing your own baby tomato plants, you can ensure that the plants are well cared for, never given anything you don't want them to have, and transplanted in just the right way at just the right time for optimal plant health. So how do you transplant tomato plants to ensure they're happy and healthy and live to produce lots of yummy tomatoes for your home?

How do you transplant a grown tomato plant?
If you've never transplanted tomatoes before, the idea can be intimidating. You have all these tiny plants that you've cared for over the last several weeks, and now it's time to pluck them out of their nursery pots and plop them into the outside soil where they're exposed to sun, weather, and critters. Luckily, you've cared for them so well that they're healthy and robust plants that will be able to handle anything nature throws at them.
Step one: Harden the plants
Hardening the plants is a term gardeners use when talking about the process of acclimating a greenhouse-grown plant to outside conditions. Typically it refers to sunlight, but it could also refer to wind and other weather that could harm the plant. About a week before you're ready to transplant, you'll want to harden your baby tomato plants by exposing them to sunlight at increasing increments each day. For example, day one should be about 30 minutes, then 45, then 50, and so on until the day of transplanting. If you don't do this, you'll risk your plant being burnt and killed when you transplant it outside.
Step two: Don't water the plants
Before you start pulling little plants out of their pots, you mustn't water the plants a few days before transplanting. Wet soil can make the transplanting process much harder on you and the plant. Dry soil falls away easier and is less likely to break off roots as you move the plants to their new home.
Step three: Prepare the new soil
The new location for your tomato plants will need to be prepped before you get all those babies out of their homes. Whether you are planting into the ground, a raised bed, or a pot, you'll want to amend the soil to guarantee that the plant has many nutrients to soak up. It also is easier if you dampen the soil right before transplanting. Damp soil is much more manageable and more easily manipulated around the plant.
Step four: Plant deeply
As you gently pull out the baby tomato plants, you'll want to shake off the old soil to expose the roots. This will ensure the plant has access to the new soil and nutrients you're about to provide it with. 

Read more