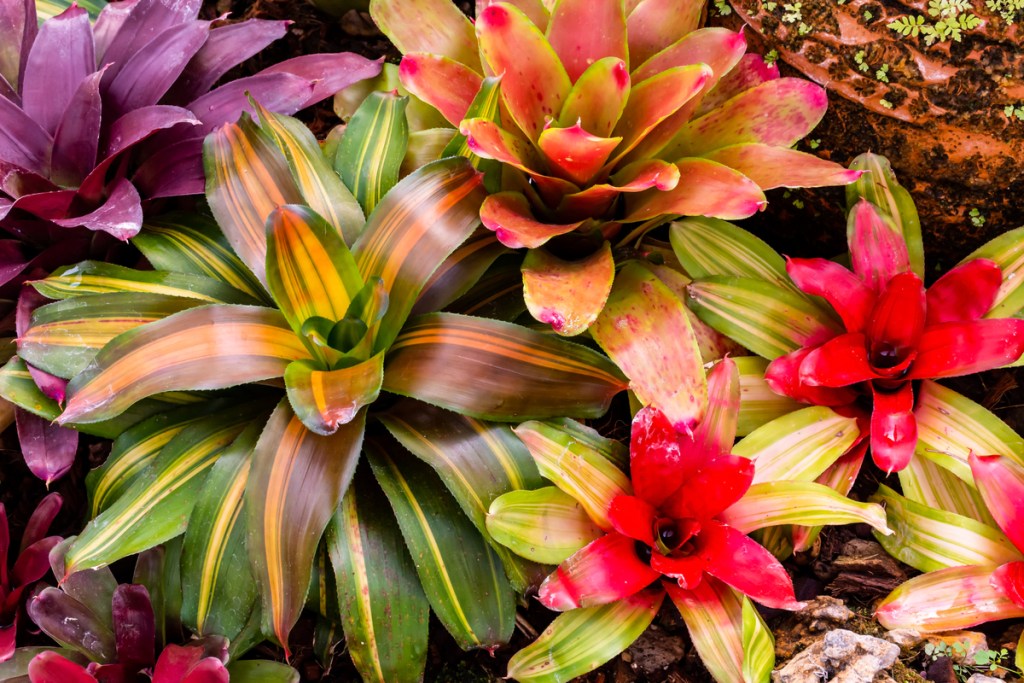
Bromeliads are beautiful, showy plants that are often intimidating to new growers — but the truth is, they’re not all that difficult to care for. Their blooms come in an array of colors, but the foliage is just as stunning. Depending on the variety, the leaves can be anywhere from red to purple to green with bands, spots, or stripes. Because of their root system and the unique nature of their watering, though, repotting is a bit more nuanced than many of your other plants. (And if you aren’t interested in soil mess, there are air plants that are part of the bromeliad family so you can still enjoy those fabulous colors!)
Should I transplant my bromeliad?
Yes, but only when it’s necessary. Bromeliads have small root systems that don’t need too much space to grow, so they won’t need to be repotted as often as fast-growing plants like pothos vines. If you’re ever concerned about whether it’s time to repot your bromeliad or not, you can look for signs like roots growing from the bottom of the container.
If you bought a young bromeliad from a nursery as opposed to a mature one and it doesn’t bloom during the season after being cared for diligently, then that’s also a sign that it needs to be moved to a larger container. Mature bromeliads, on the other hand, often come in the size pot they’ll need to be in for the rest of their days. If you want to repot it to a container of your choosing, make sure that it’s the same size as the one it came in and no bigger.
When should a bromeliad be repotted?
Repotting is best done in the spring after the growing season starts but before the bromeliad has a chance to bloom. This will be the time when it has the most energy and can better withstand the stress of being moved from one pot to another, without disrupting the blooming process or risking any unnecessary damage.
How to repot a bromeliad
To repot a bromeliad, you want to have a few things on hand before you start: protective gloves, fresh potting soil, a new container, wooden stakes, and sterilized shears in case there are any damaged roots or leaves that need to be removed. Shears also come in handy if you’re planning to remove any pups for division before putting the parent plant in its new home.
When you’ve got everything ready, follow these steps to repot your bromeliad:
- Gently remove the bromeliad from its current container. Clean off as much excess soil as possible from the roots, taking care not to damage them.
- Remove dead or damaged leaves, as well as any pups, if able. To separate them, take your sterilized pair of shears or scissors and cut them from the base of the parent plant. Each pup should be potted into its own container where it will start to grow new roots. If there are no pups, move on to step three.
- Fill the new pot to just below the surface with your bromeliad mix. Place the bromeliad in the center of the container, and fill with more soil to the base of the leaves. This ensures that your plant is deep enough in the soil, but not so deep that it will drown when you water it.
- If your bromeliad can’t stay upright on its own yet, put wooden stakes in the pot. This will help the plant stand tall while establishing its roots until it’s big enough to thrive on its own.
Keep in mind that if your bromeliad has bloomed and is producing pups, the parent plant will start to die in the next few months due to its natural cycle. If you have pups that are big enough to remove, it’s best to do so to ensure that you’ll be able to enjoy future bromeliads without needing to buy more from the nursery (unless you want to).
Can I use potting soil for bromeliads?
Yes and no. You don’t want to use standard indoor potting soil; however, you can still look for a specific mix. Because bromeliads can stay fairly wet, they need a soil that’s fast-draining but still holds moisture well. You want the excess to be able to escape quickly, which is why pots with drainage holes are especially important for bromeliads. Most gardeners will pot their bromeliads using an orchid mix due to the similar needs of both plants, but if you want to make your own, you can use two-thirds peat-based soil and one-third sand.
Do bromeliads like small pots?
Yes! Unlike some plants, bromeliads don’t have big root systems. They prefer to be kept in smaller pots, which is where they’re more likely to thrive. A young bromeliad will do well in a four-inch pot and shouldn’t be repotted until it starts to outgrow the container (look for signs like roots growing out of the drainage hole or up above the soil).
Once the plant matures, you’ll find that it doesn’t need a pot much larger than six inches — so it isn’t a plant that will quickly outgrow or overtake your space. Potting it in a much larger container can often lead to overwatering because there’s too much water in the soil for the roots to absorb.
Things to be cautious of when repotting
Because bromeliads have a small root system, you want to make sure you don’t plant them too deep in the soil when you’re repotting; however, you also don’t want them to be too shallow. If it’s too far in the soil, the crown is more prone to rotting and the plant won’t survive well. Make sure you pot just to the base of the leaves, and if the roots aren’t big enough yet to hold the plant up, feel free to use wooden stakes to help it stay upright!
If done successfully, you’ll be able to enjoy your bromeliad for as long as it lives. They aren’t high maintenance plants and their natural cycle of producing pups following blooms will let you continue keeping them around until you decide you’ve had enough (as if that could ever happen).
Editors' Recommendations
- Stunning Monstera plants that you should add to your indoor plant collection
- Beautiful, low-maintenance pothos varieties to add to your plant collection
- Your guide to rubber plant care and the best varieties to add to your home
- Are these common houseplants safe for your cat? Read this guide to find out the scoop
- These are the most popular indoor plants of 2023 – add one or all to your collection


