
Known as a resilient houseplant with a long-lasting bloom, the bromeliad is a fine addition to any plant collector’s home. Its flower spike will last three to six months, but your plant won’t likely bloom again. That said, bromeliads will form pups, which eventually bloom. So, how exactly can you divide these pups, and is there another way to get even more bromeliads? If you’re wondering how to propagate bromeliads, read ahead for the details.
How do you take cuttings from a bromeliad?
When can pups be removed from bromeliad?
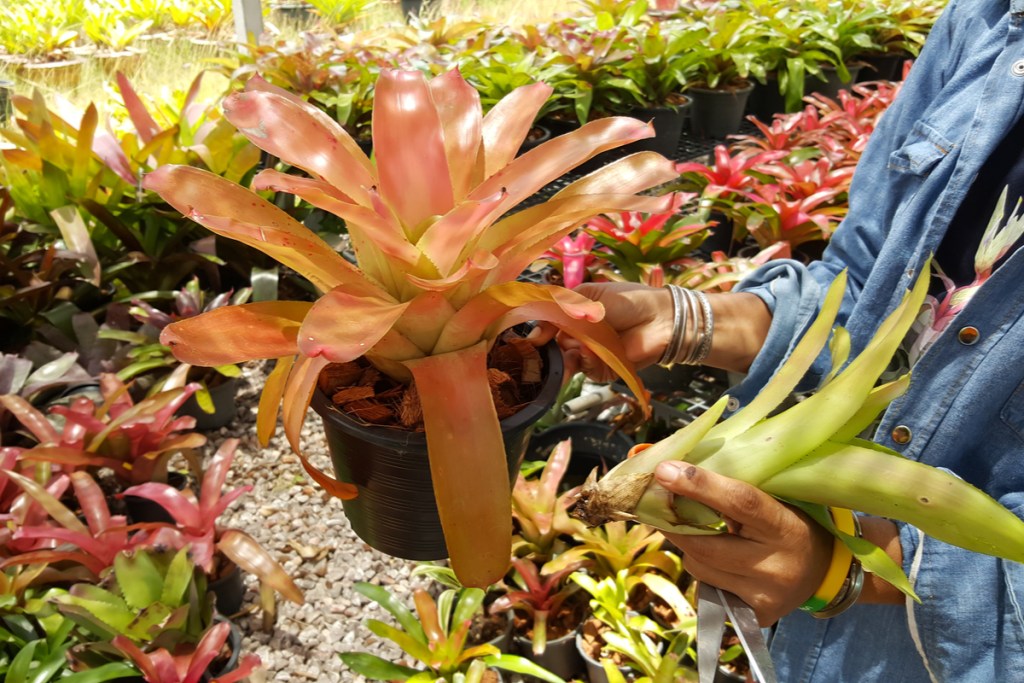
The easiest way to propagate a bromeliad is by taking cuttings of offshoots, or pups, from the base of your mother plant during spring. Before your bromeliad starts to bloom, it should begin growing pups. By the time the blooms fade, the bromeliad can put out as many as 10 pups.
Keep in mind that in most cases, baby pups aren’t prime for picking yet. Ideally, you want a bromeliad offshoot to form a rosette shape before you actually pluck it, or else it might not root or even shrivel up or rot. A good rule of thumb is to wait until the leaves measure around three or four inches in length before you start cutting off your pups.
How do you separate bromeliad pups?
To separate your pup from the mother plant, cut it as close to the base as possible. Use a clean knife to remove the offshoot, keeping a hold on the pup and mother plant as you take it off. After separating your bromeliad pups, leave them on a potting mix, watering them to never let their soil dry out and providing them with bright filtered light to encourage growth. Additionally, warm temperatures above 55 degrees Fahrenheit and monthly applications of diluted liquid fertilizer throughout the growing season will keep your new plants happy.
Can bromeliads be grown in water?
Epiphytic bromeliads (meaning, they grow in the air without soil) like air plants, can’t survive in water and will rot. If you have a terrestrial bromeliad (meaning they grow in the ground), you can experiment with rooting the pups in water. Just make sure, however, that you allow the wound where you cut off the offshoot to callus before you introduce it to water. If you place your offshoot into water too soon, it may rot — also, it may be best to use distilled water to keep a balanced pH. Clean out the water every week or two, and give your water a weak balanced fertilizer every month throughout the growing season. It may be best to grow your plant hydroponically after it already has roots instead of attempting to root it in water.
How do you grow a bromeliad from seed?
In addition to pup propagation, bromeliads can also be grown from seed — you’ll need to be more patient with this latter technique. Instead of taking cuttings during the spring, sow seeds around the same time, whether you harvest them from your bromeliad flower or buy them online. Most bromeliads don’t self-pollinate, so you need to manually pollinate your bromeliads with a brush or leave your plants outside to let pollinators work their magic. Collect the seed pods to harvest the seeds for planting, keeping in mind that they don’t last for long. Bromeliad seeds, even when stored in a cool, dry area, usually only last one to three months.
Begin the sowing process by placing your bromeliad onto a mixture of two parts moss and one part coarse sand in a germination tray or container. (You can switch up the mix, but just make sure that it’s soilless and sterile.) There’s no need to bury your seeds; mist the soil thoroughly and place your growing container in a plastic bag or underneath a humidity dome. Over a week or two, provide your seedlings with bright indirect light and pull up your bag or dome gradually to acclimate your germinating plant to more air circulation.
When you see at least six leaves, move your young bromeliads into a two- to four-inch pot. By the time your bromeliad seedlings are ready for transplant, several months may go by. Your bromeliad reaching full maturity is another beast altogether; it usually takes bromeliads around three years to achieve their full size and bloom.
To enjoy a bromeliad bloom once more, consider propagating your bromeliad plant. Propagating a bromeliad is as easy as propagating a spider plant; you can either harvest pups from your mother plant or start new plants from seed. The most convenient way is the former, and all you have to do is cut the baby offshoots from the base with a clean knife. Bromeliads will take a while to mature, but you can steadily keep a new bromeliad happy with consistent watering, bright indirect light, warm temperature, and occasional fertilizing.
Editors' Recommendations
- Everything you need to know about choosing the best rocks for landscaping
- Focus on color: Bring some sunshine to your garden with these orange plants
- Do you live in climate zone 2? Here’s what you need to know
- Could electrogardening be the way of the future?
- Climate zone 3 plants that will thrive in cool temperatures


